Exploring Low-Tech Solutions to Framing Artwork in a Professional Way
As if finishing a piece of artwork wasn't challenging enough, you then have to contend with the inevitable question 'Do I frame this? ...and if so, how?"
Framing creates a sealed environment for your artwork to live in, keeping it safe from all sorts of environmental damage (harmful UV-light, smoke, dust, etc...). In terms of long-term display and protection of your artwork, professional/custom framing is always the best quality and most permanent option, but the cost can be quite prohibitive (especially for the hobbyist or emerging artist). Fear not, there are framing solutions that are functional, professional looking, simple to do, and affordable (comparative to a professional frame job).
For this DIY, we are using an Artist's Shadowbox frame made by MCS. Amazingly, this frame design can accommodate artwork on almost any substrate, up to 5/8" thick!
Introduction to Matting
Mats both improve the overall look of framed artwork, as well as keeping the glass from coming in direct contact with the artwork (especially important when framing pastel, charcoal, graphite or coloured pencil art pieces).
The shadowbox frame that we're using here comes equipped with a single white mat, but you do have other options when it comes to matting. Both frames and matting are made in a variety of standard sizes, making it easy to mix and match to achieve a custom look. Most art stores will carry matting in standard sizes, in black and white at the very least. You may also have the option of double mats as well. (Keep in mind that a double mat is also double the thickness)

Introduction to the Shadowbox Frame
- step 1: lay the frame face down on a table
- step 2: gently turn the metal tabs towards the centre and remove backing board (and any matting)


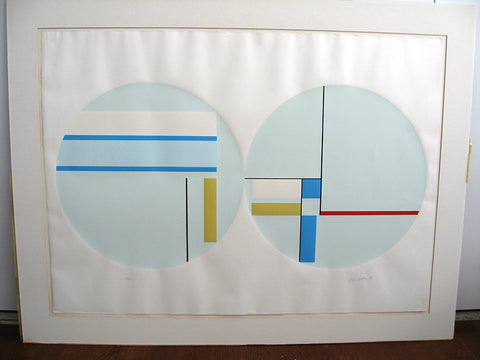
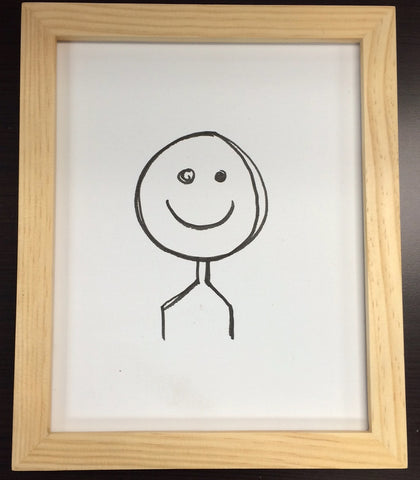
To better illustrate the versatility of this design I have rendered three masterpiece portraits; one on paper, one on canvas board, and one on 5/8" stretched canvas.
Behold my masterpieces...

We are going to show how to use the Shadowbox frame for all three substrates.
Framing Artworks on Paper:
Other materials needed:

- acid-free, single-sided adhesive tape or hinging tape
- OPTIONAL: acid-free butcher's brown paper tape or acid-free masking tape

- Step 3: remove the matting from the frame & lay the mat face down on a table

- Step 4: lay your artwork face down on top of the matting
- Step 5: gently tack the artwork in place with a single piece of tape (centered on the top edge). This creates a sort of "hinge"

- Step 6: flip over the mat and ensure that the artwork is centered as well as possible. Peel back the tape hinge to readjust as necessary.
-
Step 7: when its aligned to your liking, flip the mat face-down again and place a single piece of tape on the centre of each edge
"Why is that?"... Well, there are several lines of reasoning behind this;
- Taping the print to the mat is primarily about getting the artwork aligned on the mat. Once assembled, the glass, the frame, the matting and backing board create a sandwich, holding everything in place with tension.
- As this is a DIY frame-job, it isn't going to be as airtight as a professional job when done - this means that the artwork is still vulnerable to changes in temperature and humidity. The artwork needs room to expand and contract (to "breathe") or there is a serious risk of permanent buckling (warping/wrinkling) if the paper fibers are constricted.
- Step 8: using glass cleaner, thoroughly clean the glass of fingerprints and lint and replace glass in the frame
- Step 9: lay matting (with attached artwork) face down on the glass (in the frame) and slip the backing board into the first groove. Swivel the metal tabs back into place, firmly pressed into the first groove.
- Step 10: (OPTIONAL) Taping the back of the frame helps to make the frame more airtight, helping to ward off many potential environmental issues with pollutants, humidity, mould, etc... Simply apply butchers tape (or acid-free masking tape) around the perimeter, covering the seam between the backing board and the wood frame like so...

The finished framed paper:

Framing Artworks on Board:
- Step 3: remove the glass entirely (we will not be using it here)
- Step 4: with the frame face-down on the table, lay your board face down inside the frame


- Step 5: replace the backing board, sliding it into the first groove. Swivel the metal tabs back into place, firmly pressed into the first groove.

All done! Again, there is the option to tape the back of the frame (just repeat step 10 from above). As there is no glass in this frame set-up to help create a sealed environment, taping the back would be just for aesthetics, to make it look a little more professional.
Framing Artworks on Canvas:
- Step 3: once again, remove the glass entirely (we will not be using it here)
- Step 4: with the frame face-down on the table, lay your canvas face down inside the frame and gently smoosh it into place within the frame. Because stretched canvas is bulky where it's wrapped on the corners, some can be a little snug inside the frame.


Step 5: replace the backing board, sliding it into the second groove this time. Swivel the metal tabs back into place, firmly pressed into the second groove.
Professional framers can offer things like custom colours of matting, anti-glare glass, and an assortment of frame options such as aluminum or wood in a wide variety of colours. DIY framing will never achieve the same results a professional framing job, but it's most certainly better protection (and a more pleasing presentation format) than nothing at all.