For many of us the mere thought of varnishing makes your palms sweaty with anticipation and fear. Regardless of the type of varnish being applied (oil or acrylic, paint-on or spray-on), we're here to lay out some very simple steps for achieving the best possible results when varnishing.

Getting Started
Workspace Preparation
No matter the type of varnish or application method you're using it's always essential to have a clean workspace, free from clutter, lint and dust (as much as is possible). Dust, dander and tiny hairs can and will find their way onto the tacky surface of freshly applied varnish, so do your best to minimize the chances by cleaning thoroughly.

A Special Note on Air Quality
Here in the Kootenays, our summer weather trend has been fires, fires, and more forest fires. Air quality and visibility drops drastically during the smokey months which can affect more than just your health; it can also affect your art.
Smoke is actually billions upon billions of microscopic particles floating about, waiting to get caught in your lungs or nose hairs as you breathe, or waiting to get stuck in your freshly applied varnish... yes, this is a real thing. Poor air quality can actually affect the final results of your varnish. It's not a ridiculous idea to quarantine your workspace and leave an air purifier running for a while prior to varnishing.

Vertical or Horizontal Substrate
The sheer size or area of the painting to be varnished will help determine the best way to do it. Whenever possible laying the painting down horizontal is best for a paint-on varnish. Large scale paintings that you can't reach across are best left upright. For an aerosol varnish, you can choose either horizontal or vertical, depending on the space available to you.
The Ultimate Goal
The result we're always aiming for is a thin and even layer of varnish over the entire surface of the painting, devoid of distracting and unsightly brush strokes. To accomplish this you'll need to be able to move seamlessly from one edge of the painting to the other without stopping (whether spraying or painting) so your work space should be arranged to accommodate that seamless motion; remove any trip hazards and general clutter.
Paint-On Varnishing
Varnish can be drizzled lightly over the surface and then spread around with a wide and soft bristled brush, or you can dip the brush in varnish and spread it around the paintings surface, either method will work.
Once there is a thin layer of varnish over the whole surface it's time to even it out. Using your wide brush and beginning at the top, drag the brush in long even strokes from left to right (or right to left, whichever suits you) across the painting, always dragging the brush in the same direction.

One stroke at a time, move your way down the surface of the painting to the bottom edge. If you've accidentally applied too much varnish and the excess is pooling on the painting then mop up and drag the excess over the edges. You can wipe away any excess varnish on the edges later. Avoiding drips and runs is one reason why laying a painting down horizontally is very, very helpful.
Linear Strokes vs. Crosshatching
These are two methods of brush control that are commonly used when applying varnish. If the paintings surface is smooth then either method will work just fine, but if the paintings surface is deeply textured then it's recommended to use crosshatching (or an aerosol). Check out the following short clips to see the two different ways of applying paint-on varnish. Both crosshatching and linear strokes will yield very similar results: a smooth and uniform sheen.
Moving the brush slowly across the paintings surface in one direction helps to avoid creating air bubbles. You may see tiny little air bubbles forming as you're dragging the brush through the varnish. As soon as you notice one you'll want to pause what you're doing and pop it with a pin (or use a single brush bristle).
Aerosol Varnishing

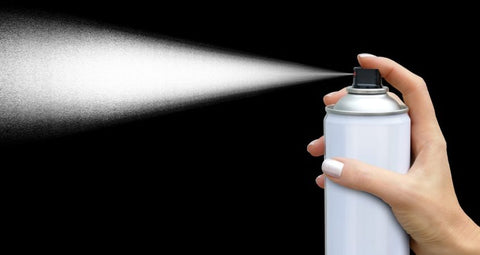
An aerosol varnish is a mist-like suspension of tiny droplets of varnish within an air or gas propellant. Aerosol varnishes are available in spray cans (such as Krylon products) or you can create your own aerosol varnish formulation and apply it using a spray gun (with an air compressor), or the delightfully low-tech YouCan.

First Things First...
I really can't believe this needs to be said but almost daily I have to explain to customers that it's not good, not safe, and definitely not recommended that you spray aerosol cans in the house. Holy cow folks, this not something you ever want to be breathing, and it will continue off-gassing VOC's for hours to days.... just don't, okay?
Health Tip
Mixing and applying your own aerosol varnish is more work but it's also a healthier option because toxic/dangerous propellants are not needed.

Whether the painting is standing upright (vertical) or laying down horizontally the most important point is that you can easily sweep your aerosol sprayer across the width of the painting without reaching awkwardly or having to stop mid-way.
Aerosol varnish application will involve a lot of over-spray that doesn't even hit the painting at all, so prepare your workspace for the excess mess. Over-spraying may seem wasteful but there are reasons; when you begin to spray, most spray nozzles will sputter and spit some larger droplets before a proper aerosol mist comes out. If you are pointing the nozzle at the painting, those heavy droplets and blobs will end up on your painting making a sloppy, uneven or drippy varnish. The reason for the over-spray at the end is the same; avoiding blobs of varnish hitting your canvas as you ease off the propellant.
Begin spraying off to one side of the painting (not even hitting the painting at first) then move your spray across the paintings surface in a smooth, even line and continue spraying until you're well off the other edge of the painting.

Continue to repeat this process, painting in extra wide stripes until the whole paintings surface is covered in a thin layer of varnish.
As always, be safe, have fun and live to varnish another day!


